How do I rename a TIA Portal project?
Best practice for renaming a TIA Portal project that is being tracked in Copia.
- Ensure that you have Auto-Archiving enabled in your Copia Desktop App
- Open the project in TIA Portal
- In TIA Portal click Project > Save As
- Save the new project with the new name in the same location in the repository as the previous project folder.
- Close TIA Portal
- Return to the Copia Desktop App. The Desktop App should have recognized the new project and Auto-Archived it. Make a commit with a description like "added the newly renamed project"
- Delete the entire old project folder
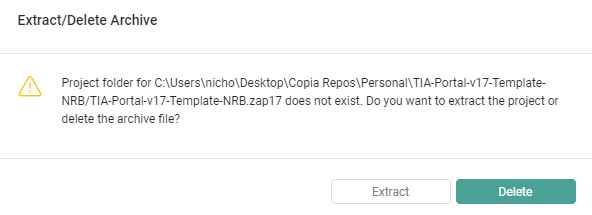
- Return to the Copia Desktop App. You will see the following message. Select "Delete". This will delete the old .zapXX file that was associated with that project

- You should see that the .zapXX file for the old project name was deleted. Make one more commit saying something like "deleted old project name".
- Note: You don't need to have two separate commits. If you want, you can do Steps 6 -8 before committing
Renaming the project will treat it as an entirely new file, so you won't be able to see a diff between the two projects in Copia.
Elements of the UI may have changed since the time of posting. For the most up-to-date information, refer to our Documentation.